Friday, December 25, 2009

New items from Taiwan Wellgo Magnesium & IceToolz

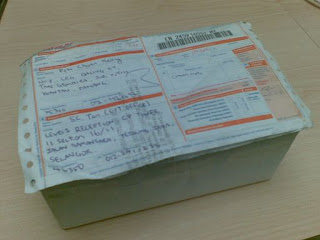
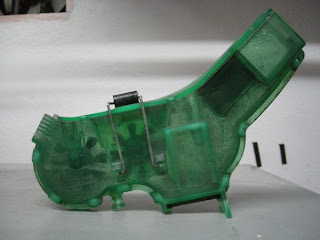
A friend of mine recently flew back from Taiwan. While he was on business trip, he managed to get me a pair of Wellgo sealed-bearing pedals and a chain scrubber. I need these items due to current wear and tear (too much riding, 25km a trip in the woods).


My current pedals are already more than a wear old with worn of bearings. It's time for me to experience sealed-bearing pedals for efficiency when pedalling.

As for the chain scrubber, I have yet to test it. I shall review it in the next post.

Merry Xmas '09 !!!

Saturday, December 12, 2009

A new frame for new year... Giant Anthem X3

It has been a while since I updated this blog. Recently, I met a friend nicknamed XY through forum and he has intention to ride again. Each one of us gave opinion to him for getting a new bike.

I then suggested Giant Anthem X series to him as this is a nice bike with 4.0 inches of rear travel. Giant company has been manufacturing bikes since my day one of mountain biking. In year 2005, I was amazed by the introduction of Maestro suspension technology. At that point in time, the whole bike would cost a bomb to me considering myself a part-time student and full time working employee.

Here's a quote from Giant's website about Maestro:
"The three core benefits that set Maestro apart are the result of careful placement of four key pivot points that neutralize both pedaling and braking forces, yet allow the suspension to remain fully active over all types of terrain." [http://www.giant-bicycles.com/en-us/technology/Maestro/32/]

After visiting some bike shops, he found out that US branded bikes look so good but he has funding problem at that time and so bought Anthem X3 after asking me about the size.

After riding twice, he found that he needed bigger travel bike for weekend ride. XY then decided to sell off his frame to me in order to purchase hand-made frame from USA. The negotiations took place for several days before I decided to take over the frame.

I fnally said 'yes' to him when the price was right. At the same time, I managed to scout Rock Shox Tora SL Solo Air 100mm fork from BBS to complement the bike frame's geometry. The moment I got the parts, I went over to Local Bike Shop around my place to transplant the parts.

Here's a pic from Giant's Official Website (Greece):


And... here's my custom Giant Anthem X3:


The test ride:
The bike can really deliver/perform towards my XC-Trail riding style and I am fully satisfied when the bike could enable me to climb as good as my previous hardtail Fuji Tahoe SL. Maestro works!

Monday, November 23, 2009

Tifosi Forza

Here's my latest new pair of shades for safety usage. I got it from a seller from BBS named Briko280. After some discussion and negotiation via MSN, I managed to settle the price to minimum inclusive of shipping. The package arrived my office on Friday 20th Nov 2009.


The Forza comes with Decentered Lens for Optical Clarity. The reason why I chose clear lens was because I always ride along shaded area in the forest and 98% transmission is really good enough for me. It is also very light and suitable for those wearing safety helmet.


I tested it the next day when riding with a newbie @ FRIM. Tifosi Forza works astonishingly during riding and it doesn't fog even at low speed. It only starts to fog when I stop riding. I guess this is normal unless those Polycarbonate lenses are treated with some sort of anti-fogging chemical.

I cannot expect this pair to be as good as my other Rudy Projects but I would say that this pair comes very close to those on the top range. It is worth buying as the price is one sixth of my Rudy Project Hyde's price.

Checkout the specs below from [http://www.tifosioptics.com/single/forza.html]

Tifosi Forza Specs...

Weight: 20 grams
Fit: Small to Medium Faces

Frame Features:
- Grilamid TR-90 Open Frame Design
- Hydrophilic Rubber Ear & Nose Piece
- Lifetime Warranty

Lens Features:
- Polycarbonate Decentered Lens for Optical Clarity
- Glare Guard™ Glare Reducer to Decrease Eye Fatigue
- 100% UVA & UVB Protection
- View Lens Chart

Sunday, November 15, 2009

Cleaning your bike chain with Finish Line Chain Cleaner Kit

Lately, my colleague lent me his Finish Line Chain Cleaner [http://www.finishlineusa.com/products/chain-cleaner.htm]. The unit has simple design in which, the case comes with internal brush on both top and bottom sides.

I went around to the city to get the bio-degradable degreaser. I could not find the Holy Cow [http://www.holycowproducts.com/] degreaser @ Ace Hardware as recommended by CK.


After few days, I decided to try my luck at Jaya DIY hardware shop situated near Section 17 area. There, I managed to get myself the Arrow degreaser recommended by the shop owner. He said "you will not know about good degreaser until you use arrow and all my customer will not use other brands". I look at the price and bargained a bit. I got the 1000ml bottle at the price of RM23.


Fully satisfied with the purchase big bottle degreaser, I took it home and read the instructions. It says:-
Heavy Cleaning >>> 1 cap of arrow with 3 caps of water
General Cleaning >>> 1 cap of arrow with 5 caps of water
Light Cleaning >>> 1 cap of arrow with 20 caps of water


[I used around 10ml with 200ml of water]

I tried the light cleaning method for my dirty chain with the chain cleaner kit. Just before i clean the chain, I took an old tooth brush and brushed off the dirt on the jockey wheels. Then, I place the chain into the chain cleaner loaded with the degreaser and start pedaling.

After many rounds of pedaling with with some shifting to various gearing combination, my chain is now shining like a necklace! Lastly, I rinsed the drive train with water (even though it does not require rinsing).


Now I know the quality of Arrow degreaser, made in Malaysia, reasonably priced and most importantly... environmental friendly!

Tuesday, October 27, 2009

The Big Nite: First Nite Jamboree in Malaysian MTB history

It was Friday nite when I rushed back to hometown with wife right after work. It was an exciting weekend as the Nite Jamboree will be held the next evening. We got home around 9.30pm and quickly unload my bike and other stuffs from the car. Not long after that, I went to meet my ex-colleague from Bangkok at Malacca town. I got home around mid-night. It was quite tiring as I had to prepare myself for the next evening ride.

The next day, I woke up early and prepare my bike for the run. I did not manage to get ECC cycling jersey as the shop was closed that morning. They must have closed the shop to organize the big event! I came home and rested for a while before going for the Jamboree registration @ Dataran Bersejarah around 1pm. I had to go there twice for separate registration when AL's team cant make it.


Once AL and company arrived, they parked their expensive bikes @ my place and then they went of for check-in @ the hotel they booked earlier. I decided to take a short nap as I needed more rest before the terrifying nite ride.

At around 6.20pm, Kelvin arrived my place with his bike. He did some quick maintenance to his bike. AL, Awang and Alex arrived minutes later all of us rushed to prepare ourselves for the check-in. We decided not to drive there and we rode our bikes to the event venue instead due to the fact that it is only 3.8km away from my place.


When we arrived at the scene, there were not many riders around the starting grid. We checked-in and later we positioned ourselves at the front area near starting grid. This is to avoid as much bottle-necks as possible during jamboree and it is our no.1 enemy for killing our time. While waiting for the race to start, the organizer played nice songs and there was a Loy-Kratong dance by a pair of Thai Ladies from Chieng-Mai. I took the opportunity to do some stretching minutes before the race started.


At 8.30pm sharp, the organizer flag us off and we rode slowly along the highway escorted by motorcross bikes and a SUV. Policemen also assisted us to block the traffic so that the huge bunch of riders can cross the busy highway. We entered the offroad trail after few kilometres of highway ride. There was a small bottleneck as some are afraid to go to the first steep downhill section. I try to keep the pace and I could roughly estimate that there were about 60 - 70 riders in front of me.

I managed to pass several riders on each uphill sections at the oil palm plantation area but my right calf was cramp and I had to stop at Check-Point 1 (CP1). I rested for a while feeling sad because I could see riders passing through every second. I quickly refill the water and added the Booster Blitz to my hydration pack for the entire journey.


I continued to CP2 by keeping the RPM slowly so that my muscle does not overworked. I knew that I had to drink plenty of water to recover my musle and I slowly sipped the hose as I ride every few hundred metres. The Booster Blitz worked!

I regained some strength after less than half an hour and I felt so good to ride fast. I didnt stop for fuel @ CP2. From CP2 onwards, it was like a roller coaster ride at the single tracks. I charged my bike fast as there were less people on the singletrack trails. There were few DH sections whereby some riders in front of me crashed badly. I was able to avoid the contact and continued charging to CP3.


At CP3, I didnt stop as well as I could feel that my hydration pack still full with water. There I came across a big group riding into more technical sections. Since I am afraid to ride alone, I tried my best to keep the pace behind them. Soon after crossing some rubber plantation, paddy fields I landed at CP4 and I didnt stop for fuel because I still okay.

The chase was still on until CP5 when I again didnt stop for fuel(water and bananas) but I was having a minor problem right after the checkpoint because the batteries have caused my headlight to become quite dim. I knew I had to ride faster and faster before it runs out and all of a sudden, i felt cramp on my left thigh followed by the right thigh.

I stopped after few hundred metres near a rider who was having punctured front tire. I swiftly tried to replace the batteries but i couldn't open the cover! Oh my... I had to ask the man to open it for me. Once done, I thanked him and left the place. By this time, so many riders overtooked me already!

Lastly, I exited the plantation area to the highway and there I got the third cramp on both thighs! The RELA guy who was guarding the exit wanted to assist me but I told him that I was okay. We smiled. I rested just for few minutes before riding the last 5km tarmac stretch to the finish line. I was the 138th person to complete the jamboree and it took me exactly quite close to 3 hours.

It was a memorable event and it could have been better if my flashlight could last longer and my legs were without any cramps.

Thursday, October 22, 2009

Final preparation: Nite Jamboree 2009

It was a quick decision to sell off my newly bought Velo saddle when I saw WTB Rocket-V being posted on BBS. I bought Velo because Rocket-V was out of stock at TScycle.

It was 2am when i saw the ads and I quickly texted the guy for negotiation. After exchanging few SMSes, we finally settled on the price and COD (cash on delivery) place. I got the saddle for RM80.00. That guy took it out from his new Giant bike.

Here's my WTB Rocket-V installed on my Kona seatpost. It is now ready for long hours ride of 45km stretch.


The next day, I managed to sell my Velo to a guy named Harry from UUM Kedah. I shipped to him my Velo via Post Laju. The same goes to my FSA XC 170 90mm stem.

I lost my pump recently @ Kiara with the LYN boys and it is much hassle to ride to petrol station everytime when I need to pump my tires. I got this Carbon Beto for RM40 from TSCycle. Lightweight and small enough to carry around for Jamboree / weekend rides:


Another sudden upgrade was the spokes for my wheelset. It was on Wednesday afternoon when I dropped by KSH TTDI bike shop for chain cleaner set. The seller named Leung informed me that all the sets have been sold out. Not a lucky day for me.

I then just asked him for fun about the DT-Swiss spokes whether the price is still the same or not but he replied "increased already". I am not surprised as usual because the prices will increase due to the local demand around Klang Valley. My spokes rusted after 1 year of riding. That really bothers me! I never like rusty parts.

I then negotiated with Leung to give me the old price so that I can help to clear his stocks fast, and it worked! LOL. I got the following package:-

Type: DT champion (for rough/tough usage without butted design)
Price: RM1xx.00 for a set of wheels (front and back) inclusive of lacing and truing

I collected one of the wheelset and the workmanship is not bad. The attached image depicts on how to identify genuine DT Spokes.


I hope to collect the other wheel (rear) in time so that I can rush back to Melaka early. Hope everything will be smooth for me to complete the Nite Jamboree, 24th Oct 2009!

Friday, October 9, 2009

Nite Jamboree Preparation 02: Fuji Tahoe SL 2007's Cockpit Redefined!

After joining LowYat.net's MTB group for riding, I begin to realize that Kiara is like a Shaolin temple. Definately it is not an easy place to ride.

The climbs are non-stop, the down hill sections are killing and the single tracks with lots of roots, narrow path between trees, and the sudden drops are madness! This is what I can conclude in mixture of several trails for a half day ride.

The video below depicts how technical Kiara is...


In order for me to have better control at these challenging trails, I refined my bike further on the cockpit section as this is one of the most important area for bike handling.


The Stem...
Model: KCNC Bear Arm
Clamp size: 31.8mm clamp size,
Extension: 70mm stretch,
Rise: 5°
Material: 6061 - T6 Aluminium
Price: RM85

The Handlebar...
Model: Bontrager Crow Bar
Type: Low Riser - 25mm rise
Length: 600mm
Material: 6061 - T6 Custom Butted Aluminium
Price: RM45

After spending few hours removing the current components and replacing them with new ones, plus balancing of the bar, I could sense instant difference. I have yet to try it and hopefully the new XC+Trail riding style setup works.

Tuesday, September 29, 2009

Riding with LYN forumers @ Kiara Trails

Last weekend's ride was fun @ Kiara. Why? Well, because it's so dry that you can ride a little faster than usual but still, if you are not careful enough, your rear section will slide off to the side easily. Since I am not so familiar riding at Kiara, I had to play safe all the time.

We started of as usual from the Kiara Park's uphill section to the inner tarmac section of the biker's playground. There you will see many people parking their car and then walk up for a tarmac loops surrounded by the green lungs of KL - Kiara Hills. We saw a long skinny snake during the initial climb, at the bushes parallel to the road. We just stood there watching the snake pass by and then only we continued.

In order to get into the 2K trail, we had to climb up on tarmac road up untill a cross junction is visible. There, you should be able to spot 2 huts on your left and right. The one one the left looks more like a guardhouse to me. There we quite a number of joggers and hikers along the way. The hut situated on the right side of the cross junction was flooded with bikers surrounding it as it is a good place for bikers to rest after a quick thrilling lap in 2K trail.

Most of us panted by the time we reached the cross junction as this is part of warm up before entering the off road trail. We continued further without wasting much time as CK and Adrian gotta rush home early on that sunny Sunday morning.

Once completed the roller coaster ride in 2K, we carried on to the further down after the Bukit Kiara Equestrian Club. There we took an exit out to a section whereby you will be riding along the highway towards Hartamas / Mont Kiara for approximately 3 to 4 hundred metres before heading back to the forest.

At one point, we were tackling a steep switchback towards a stream and CK who happened to be in front of me, saw a barking dog heading towards his way when he was crossing halfway on the narrow bridge.

He jumped out of his bike for safety and before i could proceed further, the dog just passed me swiftly with serious deep wound on its head with the size of a diameter of a small bowl. CK told me that he could see the brain! Yucks! That dog must have been tortured by someone with sharp object - So cruel! I felt so pity and kept on thinking about how long can the dog survive without proper medication.

Adrian Ngiam's bike puncture twice on the way back! One on flat path while the other was during the Rock Garden. The video shown in this post was taken at Rock Garden & Kiara Park(ending of the trail).


I hope to ride more as the 45km nite ride @ Malacca is just around the corner. :)

Saturday, September 19, 2009

Nite Jamboree Preparation 01: Fuji Tahoe SL Mountain Bike

The last Kiara ride was fun but i sensed something wrong with the switchback climb. My front wheel lifted up easily even when using TORA 302 heavy-solid fork. Hmmm, after inspecting my bike, I have concluded that the current Race Face Prodigy could be the minor cause.

Since Fuji Tahoe SL's seat tube is already very close(good for climbing) to the rear wheel, I don't think I should stay with the bent seat post design as my weight distribution will be more towards the rear section and this could cause my front wheel to be lifted up easily during climbs.

I dropped by Tat Seng and found a nice "Kona 400mm XC/BC Deluxe Seatpost" which is pearl in colour. It is also quite light, considering its length of 400mm. After some decision making, I bought it together with "Velo VL 1261 B Saddle".

I purchase the saddle based on the comfort, slim design(for quicker move towards the back prior to downhill section)and also the air vents. The specs of this saddle can be found attached.

Kona 400mm XC/BC Deluxe Seatpost Product Details:
•3D forged 1 piece head & post
•2014 aluminum
•2 bolt clamp design
•27.2mm diameter or 30.0mm, 400mm length

Velo VL 1261 B Saddle Main Features:
•AirThru™ VENTILATION Perforated base and upper for ventilation.
•Crossbow™ SUSPENSION Laterally disperses road vibration.
•HONEYCOMB GEL PADDING Gel inserts at three key pressure points

Once fitted both items to my bike, I took a short test around the housing area. I found that the seating position is a little bit forward in which it exceeds my expectation. I am still trying to get used to the new saddle and hopefully these will assist me to ride easier during the upcoming Nite Jamboree [ http://eccmalacca.blogspot.com/ ].

Saturday, September 12, 2009

Too compact? Get Deuter Race !

Recently, I realized how small and compact my Hydro Lite 2.0 is. Just look at the photo below during recent ride whereby a member named Adrian(N) got his rear wheel punctured.


CK promptly unload his hydro-pack and took a toolkit. By looking at that, I was wondering, what if I happen to puncture my tire and my compact back is without any toolkit?

I was at Summit USJ and I was looking for Adidas outdoor shoes yesterday but that shop was running out of stocks. I then wandered around and found a shop with some Deuter bags. I went in with my wife hoping to get a bag to put junior's stuff.


We found Deuter Race year 2009 on display and discussed about it as I can use if for biking or putting milk bottles for baby... LOL. Since I need a bigger back for weekend riding, I decided to purchase the bag as I know it would be useful. 10 litres capacity is good enough for weekend's few hours ride.
Pics and specs taken from Deuter's website.[http://www.deuter.com/en/products/32009_Race_09_DEU.php]


Specifications:-
Brand: Deuter
Category: Bike
Model: Race
Year: 2009
Weight: 520 g
Volume: 10 l
Size: 43 / 23/ 16 (H/B/T) cm
Material: HexLite 210 / Microrip-Nylon

After many years, I still love Deuter products. It is not so expensive as compared to other brands like Vaude, Solomon and etc. and their products are really high in quality.

RRI Ride & Chung San BKT

It was on last Saturday(Sept 5th) when I rode the first time @ RRI offroad trail. It was organized by Adrian Wong and the boys (Harrison & Benjamin brothers). Kelvin and AL joined last minute the night before.

When we first rode in, I sense that the trail is somehow similar to the one @ Elmina along Guthrie Highway - both on plantation area. The only difference are the plantation type and offroad surface. RRI is covered with rubbers trees with muddy and gravel stretch while Elmina is covered with oil palm trees and laterite surface.

Riding @ RRI does not require specific skills as the trails are flat with some minor climbs. This can be enjoyable if there is a huge crowd riding together. We had some fun exploring the trails but halfway while riding and chatting with Kelvin, I got stucked at the muddy area! The mud was so thick that my shoes and tires looked so thick! LOL!

The most interesting part about RRI is this place is infested with mosquitoes! Most of us were attacked badly during the last stretch. AL's arm was covered with SO MANY redspots because he has fair complexion.


We decided to have lunch together after the ride. Peter Wong (Adrian's cousin) brought us to Chung San Bak Kut Teh near Sungai Buloh commercial area. That lunch was nice, thanks to Peter and he paid for all of us. We wanted to return him the cash but he refused as he said we should celebrate for SinC because he is going to be a father soon. So embarassing! :)

Monday, August 31, 2009

Makan-Makan: De' Chiengmai

This will be a short post as it is about food. I had it during my parents visit last week. My sister brought my parents there and I happened to be able to join them.

By the time I arrived, they almost finished the food! Luckily, they left most of the seafood for me - no pictures coz too hungry.


About the place:
It is situated about 1.7km away from Sungai Buloh Hospital


GPS Location:
N 03° 13.464 & E 101° 34.120


Environment:
Spacious, Posh, Away from city, and Clean!


Food Quality:
You gotta try it yourself. Since I had Thai food for a year in Bangkok, the taste comes very close to those in good Thai restaurants around Krung-Thep area!

Tuesday, August 25, 2009

ASUS K40AB Price vs. Performance?

My sister recently told me that she is looking for a notebook with RM 2k budget. I told her about the hottest selling ASUS model K40AB-VX001L. The reason why I recommend this notebook to her is simply because the GPU specification is above average users' requirement and the price tag is only RM2099!

This notebook is running on dedicated 512MB video memory (VRAM) - Just imagine playing Call of Duty 4 with higher graphic settings - phenomenal! Well, this GPU would really help my sister(an architect) in her daily sketches using AUTO-CAD.


Specifications as below:-

Model: Asus K40AB-VX001L-LINUX
Display: 14" HD LED Slim (1366x768) Color-Shine (Glare-type),Vesa Like
Operating System: No OS (Linux only)
Processor: AMD Athlon X2 QL64-2.1GHz
Main Memory: 2GB RAM (Added 2GB to make it 4GB)
Hard Disk Drive: 250GB HDD
Video Graphics & Memory: ATI Mobility™ Radeon® HD 4570, 512MB VRAM
Optical Drive: 8X DVD Super Multi-Dual
Video Camera: 1.3MP
Fax/Modem/LAN/WLAN Integrated 802.11 b/g/n
10/100/1000 Base T
Interface 1 x Microphone-in jack
1 x Headphone-out jack
1 x VGA port/Mini D-sub 15-pin for external monitor
4 x USB 2.0 ports
1 x RJ45 LAN Jack for LAN insert
Audio Built-in speaker and microphone
Altec Lansing® co-brand speakers
SRS Premium Sound
Battery 6 cells: 2200 mAh
Product Dimensions: 34.5 x 24.9 x 3.1~3.55 cm (W x D x H)
Weight: 2.35KG


My brother-in-law and I went to hunt for this glossy lappy @ Low Yat. We ended up buying it from Evernew IT shop as they have branches all over the malls around Klang Valley. I also made sure that the seller provides us the XP drivers as nowadays, newer notebooks have limited driver range for Windows XP.


Once I came back from LowYat, I installed licenced XP Pro, drivers and Service Packs. According to some users, XP drivers is not available easily and they have to ask other forumers to send them. My case is different,... the drivers supplied by the sales guy worked smoothly without an issue.

I also bought myself a Samsung Laser Mouse with Selectable Sensitivity Switch (1600dpi, 1200dpi, 800dpi, & 400dpi) because I have to give away my current mouse to my sister. :P


Installation was very smooth and speedy as the dual core AMD Athlon X2 QL64-2.1GHz processor did its job well. I then imaged the entire partition for 5-minutes-future recovery. I might want to consider ASUS notebooks in future as this company is good in producing reasonably priced versus performance laptops!

Sunday, August 23, 2009

Water Pump

I had my car repaired yesterday after the FRIM early morning ride. This time is it due to the water pump. In order for you guys to know if the water pump starts giving problems, check the list below:-

- Clucking noise from the belting area @ engine compartment
- Acceleration a little heavier
- Engine sound is louder during heavy acceleration (as if engine is going to fall off the car)
- Poor fuel consumption

I went to my mechanic at Jalan Gasing to confirm it. He took a small steel pipe and placed one end to the engine parts and the other to his ear. It was a bit funny but it worked. He could confirm where the sound came from - the faulty engine water pump.

According to him, the brand that I wanted him to replace (GMB) has fake units from China. Being afraid to get cheated by possible low quality production, I opted a Japanese water pump named BTKS - haven't heard about it but I have more confidence than the other brand.


The mechanic flushes all the dirt from my radiator before installing the new pump. He used proper sealant for the gasket and he also pressurised my radiator to 20psi(if not mistaken) using a pressure canister in order to detect any leakage after the pump replacement. I like the way he repairs my car as he does not like to rush just to complete the job faster. It was worth waiting for his quality job.

The car feels so much better now with better fuel consumption due to smoother engine run. No more repeated clucking sounds. :)

Tuesday, August 18, 2009

Faulty 4 - Gang Extension module

Last Friday morning was a shocking experience for me. As I was having my quick breakfast by just munching at my cubicle, I heard an explosion (small one). I ignored the sound as I thought it was not serious because the munching sounds caused my ears to be less sensitive.

All my colleagues stood up and look at me. I felt strange and I asked, "what are you guys lookin at?" By the time one of them came over, I could smell burnt pvc material very near to my office notebook. My colleague who walked over told me that she saw a spark followed by the small explosion sound. She also added that the explosion has caused power tripped to all their cubicle sockets. I replied "Ehh? Really" and they looked at me angrily.


I sniffed all around the notebook area and finally I found the first socket of the 4-gang extension module got burnt. I didn't bother much as I had to attend training downstairs.

The same explosion occured right after lunch time when I was experimenting the same 4-gang extension with another socket. This time, my colleague Justin warned me not to play with it anymore.

Being a stubborn person, I asked Lydia, whose father is an electrician about the problem. She asked me to dismantle the module and I did. I saw burnt marks on both sockets and we found out that each of the socket is connected to an LED and a resistor.


We have concluded that the resistor might be faulty and could not take the load and burst. So being an office McGuyver, I cut loose all connecting LEDs together with its' resistor and assemble back the extension module.

I did few testings and it works fine! So, the lesson learnt is -> never purchase the 4-gang extension with light indicator! That would add more electronic components to the module and one the component fails, it would cause explosion. Beware. :)

Wednesday, August 5, 2009

My Satria's Faulty absorbers

Lately, I feel funny when driving my car especially the braking and cornering. I could not stop my car within the distance I expected it to do and also my car sways during cornering.

My newly installed Bendix brake pads are good and served me well for the past few months but still, braking is not efficient enough and my car has been too bouncy as well. I suspected something amiss with the suspension system and my assumption was absolutely correct after I heard clunking sound on the front left of my car after climbing the ramp of the office basement parking area.

This is scarry as the whole car is now unstable due to no proper support by the absorbers. Since the Satria is quite old, I think I forgot to replace the shocks and coils after 65000km. Oops!

Two days ago, I dropped by my favourite spare parts shop around PJ area to get new absorbers. I selected Kayaba shocks because they are less expensive and reliable. KYB Malaysia actually manufactures shocks for many Japanese cars such as Vios, Latio, Grand Livinia and so forth.

Since there is no other brand for the coil springs, I ended up buying APM coils for both front and rear absorbers. I bought oil-based for the front and gas-charged for the rear. I ended up damaging my wallet for RM 470.00 without installation.


Here's a short calculation for the total cost:
- KYB Front oil-type shocks = RM88.00 x 2 = RM 176.00
- KYB Rear gas-charged shocks = RM 58.00 x 2 = RM 116.00
- APM Coil springs (Front) = RM 46.00 x 2 = RM 92.00
- APM Coil springs (Rear) = RM 43.00 x 2 = RM 86.00

I think, the whole cost spent on the car (for 4 wheels) is still cheaper than my Rock Shox Tora fork of my mountain bike. Maybe I should quit mountain biking eh? LOL

I have yet to install the shocks due to busy weekdays' schedule and hopefully my mechanic near Jalan Gasing can install them with reasonable price.

Saturday, July 25, 2009

Putrajaya Challenge Park : Bike Park Completed

Today's ride was an interesting one. Kelvin, AL and myself rode a bit later than Alan and Gerard because AL has to pick Kelvin up first. I saw Alan and Gerard wondering around with their bike at the bike part building area. I didn't honk them as I was already nearby the parking lot by 1 u-turn.

Right after parking my car, I quickly assembled my bike and went over to meet the guys. Unfortunately, they already left the building area. Without wasting much time, I went on climbing to the first hut for a warm up. I noticed that the is a four-cross (4X) track on my right side. It has been completed! I took some photos while waiting for Kelvin and AL.


Few minutes later, I saw AL's RUSH and I rode on the 4X section down to meet them. It was so scarry for me riding the higher ramps! The whole bike went down fast and then it has to climb up again through the curved, steep ramp making the bike floats in the air.


Trying the ramps yourself and watching those professional bikers @ X-games are totally 2 different things! They can fly-up in the air for few meters (example: Cameron Zink) while you... almost peed even your bike leaves the ground just by few inches. :P


Once all done with the bike setup, Kelvin, AL and I went up to the mountain bike trail where we met Alan and Gerard resting after completing some sections. Another good part about the mountain bike trail is that all the sections are labelled with numbers (in sequence). One can choose to ride full trail length or just few sections only.


AL and I were panting heavily each time we completed a section. I felt so useless. I should ride more often to train myself. As usual, Kelvin will complete his favourite 6 sections without any problem. Now I know that PCP is his playground.

Thursday, July 16, 2009

Paintball by Mudtrekker @ Kuang Forest

It was few years back since I played my last paintball game. It was fun @ Subang park organized by TT-Sports.

Last weekend's paint(pain) ball session was really fun and really tiring. We played 7 sets continuously within 3 hours.


It took us almost 35 minutes to get to Kuang from PJ area. Kuang is located near Sungai Buloh. One can find the exit under the overhead bridge near after ING building from LDP toll.


It was still early when I arrived but more than 70% of the team members were not there yet. I dun blame them as it is not easy to find the location. The map provided by organizer really sucks and I had to request them the GPS coordinates [N 03°15'50.0, E101°33'17.2].


The game was torturing as the cheap paintball marker (gun) itself could weigh up to +/-2kgs. When ever the marshals shouted "go", I ran forward to get the best cover before I start firing.


I usually had to fire one or two bullets first before i can target the victim better. This is simply because i really have to get the projection right as the cheap marker can only fire around 200ft per second, thus making the bullets look heavy when they travel out of the nozzle.


Many of us positioned ourselves in so many styles. Some just hid behind walls or barrels, some shooting non-stop for no reason, some just crouch and some prone behind the barrels.


First few rounds was at the battle-field whereby you are surrounded by old car chassis, liquid, barrels, tank-car replica and some walls erected at the base (all the way to the back). Another interesting spot where we played was at the jungle with bunkers, bushes and trees. I could really experience the feeling of those soldiers battling in dense tropical jungle - so scarry. You may hit by bullets at any point of time!


Lastly the game ended after 3 tiring hours. I went home, shower and straight away slept like a pig!

Upcoming activity(ies)

Desc:
Date:
Time:
Venue:
Coordinates :
Trail: